Using Katalon Studio, mobile tester can design automation test for both Android and iOS to run on physical devices, cloud services and emulators.
This tutorial explains how to setup a mobile project for Katalon Studio in macOS. It assumes that you are familiar with general principles of automated testing and have minimal knowledge of the Katalon Studio IDE. You may want to our earlier post on setting up Mobile Automation Project in Windows.
In this Post
Setup Prerequisites
Katalon Studio requires latest installation of Appium, Node.js. Please setup as following steps:
- Install Homebrew from Terminal:
| /usr/bin/ruby -e “$(curl -fsSL https://raw.githubusercontent.com/Homebrew/install/master/install)” |
- Install Carthage with Homebrew:
| brew install carthage |
- Install node and npm with Homebrew:
| brew install node
brew install npm |
Note: To make sure Node.js is installed correctly, you can open a new terminal and type which node to see if system can find it.
- Install Appium with npm
| npm install -g appium |
- Set Appium Directory to “/usr/local/lib/node_modules/appium” in Katalon Preferences (from Katalon menu, go to Preferences > Katalon > Mobile)
You will need to install and configure Xcode in case of testing on iOS devices. Please set up Xcode as following:
- Open Xcode > Preferences > Accounts: Add developer’s Apple ID

- Open Terminal at WebDriverAgent in Appium directory folder: <…>/appium/node_modules/appium-xcuitest-driver/WebDriverAgent and enter following command to initialize WebDriverAgent project:
| mkdir -p Resources/WebDriverAgent.bundle
sh ./Scripts/bootstrap.sh -d |
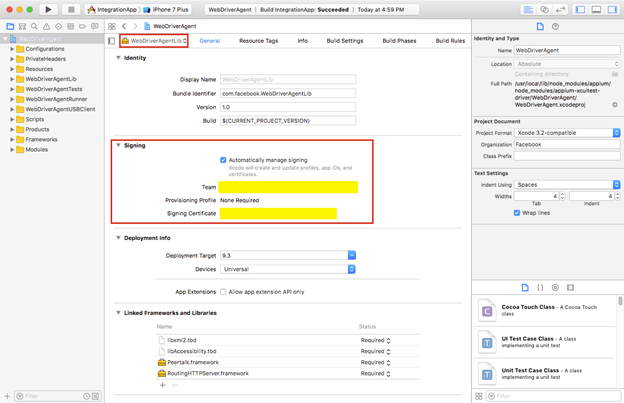
- Open project WebDriverAgent.xcodeproj within folder WebDriverAgent in Xcode.

- Select target WebDriverAgentLib, in the Signing section, check Automatically manage signing and select the team.
- Then on the menu bar, select Product > Build
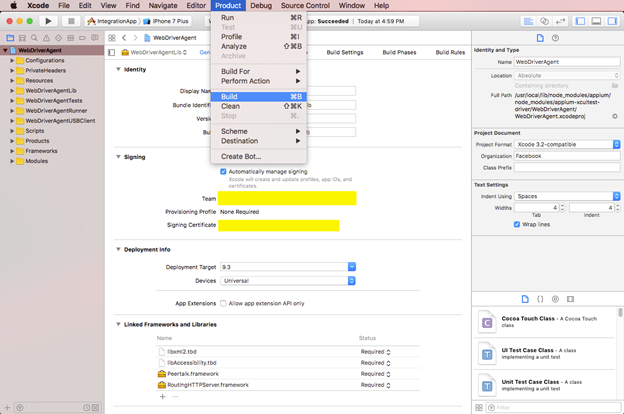
- Repeat the last two steps for WebDriverAgentRunner
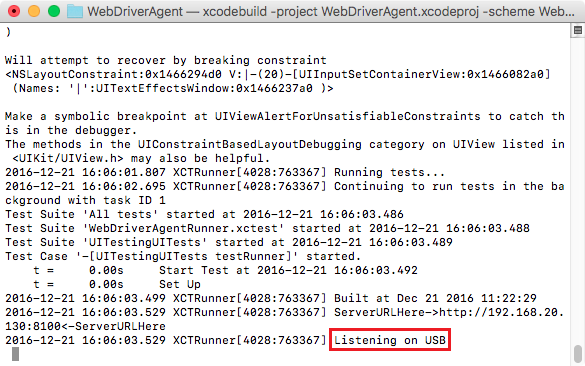
- Build WebDriverAgent to verify all above steps worked
| xcodebuild -project WebDriverAgent.xcodeproj -scheme WebDriverAgentRunner -destination ‘id=<udid>’ test
Where: <udid> is the device UDID |
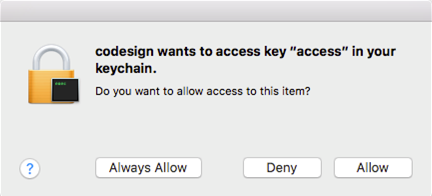
- In case this dialog is displayed, select Always Allow.
- You should be able to see Listening on USB as the last line on build output.
Setup Devices
For Android devices:
- Turn on the phone’s developer mode (go to Settings > Developer options).
- Connect your Android Phone to your computer via a USB cable. Just confirm if prompted for accepting/trusting the phone.
For iOS devices:
- Connect your iOS Devices to your computer via a USB cable. Just confirm if prompted for accepting/trusting the phone.
- For iOS 8 and higher, you must enable the service UI automation on the device (connect the iOS device to Xcode) as following steps:
- plug in the iOS device
- open Xcode on Mac
- go to Settings on the iOS device > Developer > turn ON UIAutomation
- For iOS 6 and higher, on your iOS device, go to Settings > Safari > Advanced and enable Web Inspector
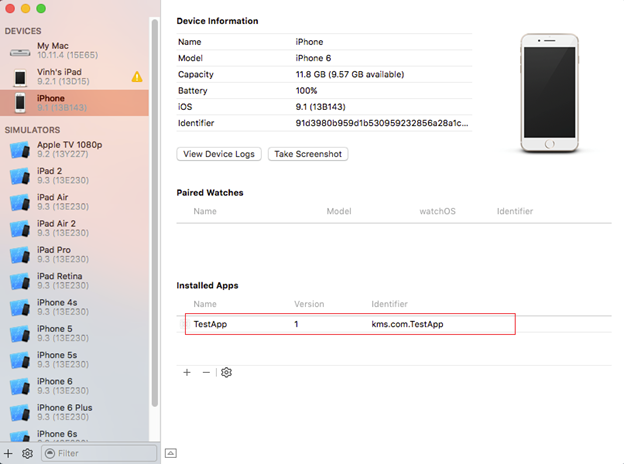
- To test an iOS native application file (.ipa or .app file), make sure the application file is already built and signed properly to deploy on the device. Follow these steps to check if an application file is already built and signed correctly:
- Open Xcode and navigate to Window/Devices
- Choose your device from the Devices list
- Press the “+” button and choose your application file

-
- If installed successfully, the application will appear in the Installed Apps section as shown below
Desired Capabilities
You can modify extra Desired Capabilities when executing automation test in Katalon Studio.
To define Desired Capabilities for local execution using Chrome, Firefox, IE, Safari or Edge, please access Project > Settings > Execution > Default > Mobile > iOS (or Android)
The example below show a desired capabilities settings for Android to enable Unicode input.

Refer to https://github.com/SeleniumHQ/selenium/wiki/DesiredCapabilities to know which properties of each web browser are supported by Selenium. For desire capabilities to be used with Appium, refer to this list: http://appium.io/slate/en/master/?ruby#appium-server-capabilities.
External Library
With this setting, you can manage your external libraries by adding new ones or remove existing ones. Please access the settings at menu Project > Settings > External Libraries.
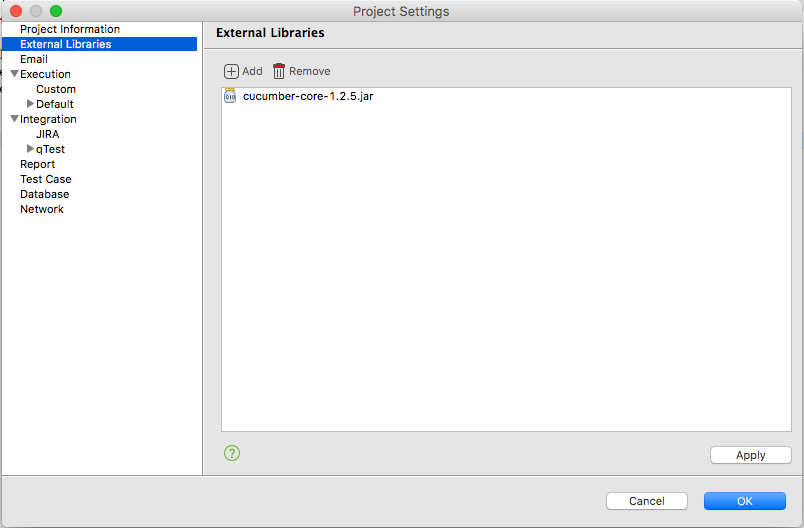
- Add: Click to add your external libraries. The selected libraries will be copied to Drivers folder of Katalon project
- Remove: Click to remove existing libraries. They will be removed from Drivers folder in Katalon project
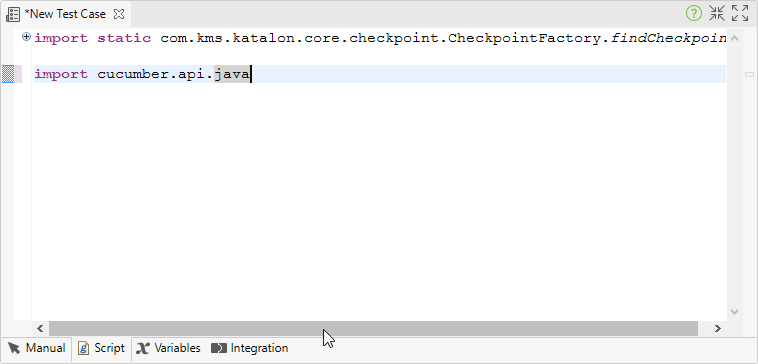
The added libraries can be imported and utilized in the Script View of Katalon Studio:
[…] Setting up Mobile Automation Project in MacOS – Saket Kumar – https://automated-360.com/katalon-studio/setting-up-mobile-automation-project-in-macos/ […]
please can you give me a configuration that can detect ios devices ?
I mean version of MacOS, of Xcode, of appium, of Katalon Studio, …
Thanks a lot
[…] Setting up Mobile Automation Project in MacOS […]