
It is crucial and important for your test automation suite to have a code quality check in place for your test automation script. In this post, we’ll look at one of the many methods to use SonarQube to implement code quality checks. The focus of this article is on how to easily integrate Jenkins and SonarQube for test automation scripts. Other ways to connect to SonarQube include utilizing the SonarLint Plugin, launching a local version of SonarQube, and using Jenkin Jobs.
To integrate SonarQube with Jenkins we need to use Jenkins SonarQube Plugin – SonarQube Scanner
In this Post
What is SonarQube Scanner?

SonarQube Scanner, also known as SonarScanner, is a SonarQube plugin that enables seamless interaction with SonarQube. Once you’ve set up Jenkins integration, you may use regular build steps or pipelines to trigger analysis.
Setup SonarQube in Jenkins
To set up the SonarQube in Jenkins, follow the instructions below.
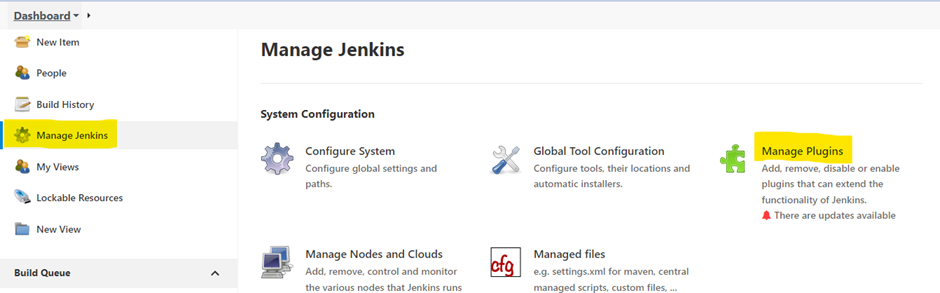
Log in into Jenkins–>Manage Jenkins.
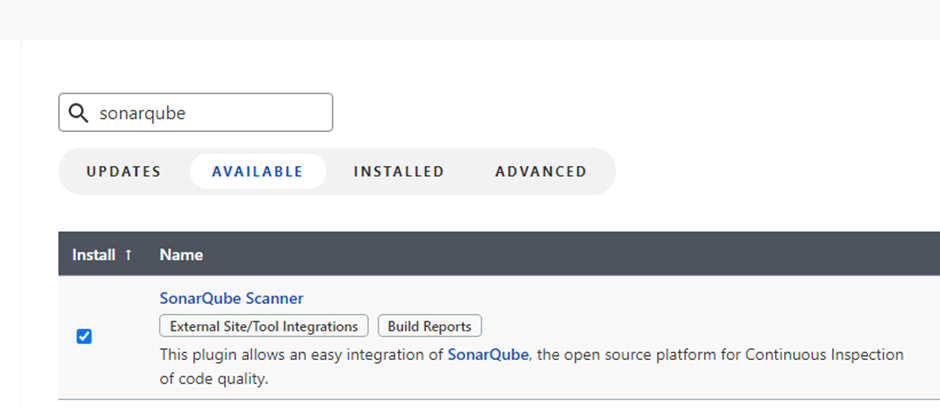
Search for SonarQube Scanner Plugin and install. You must restart Jenkins after the plugin installation.
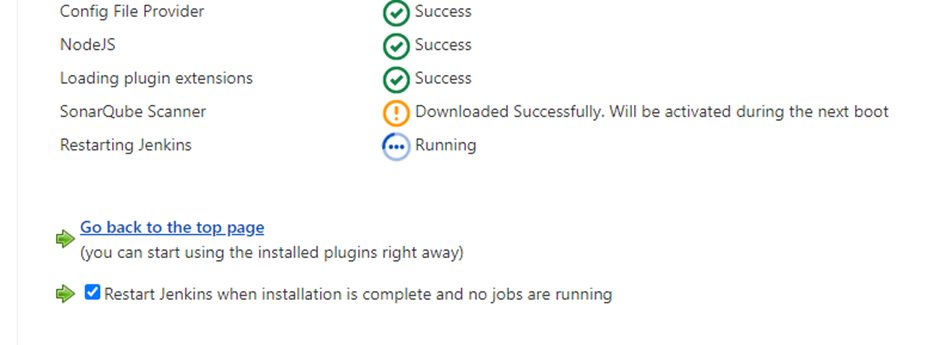
Make sure to check the Restart Jenkins when installation is complete and no jobs are running
Setup the SonarQube Scanner plugin-in
Go to Dashboard > Manage Jenkins > Configure System
look for SonaQube Installations and provide the details of your SonarQube instance
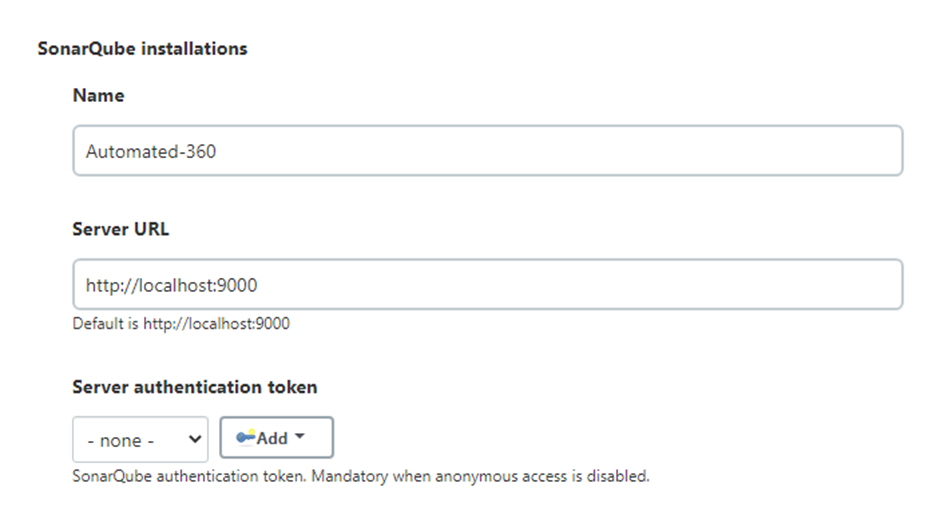
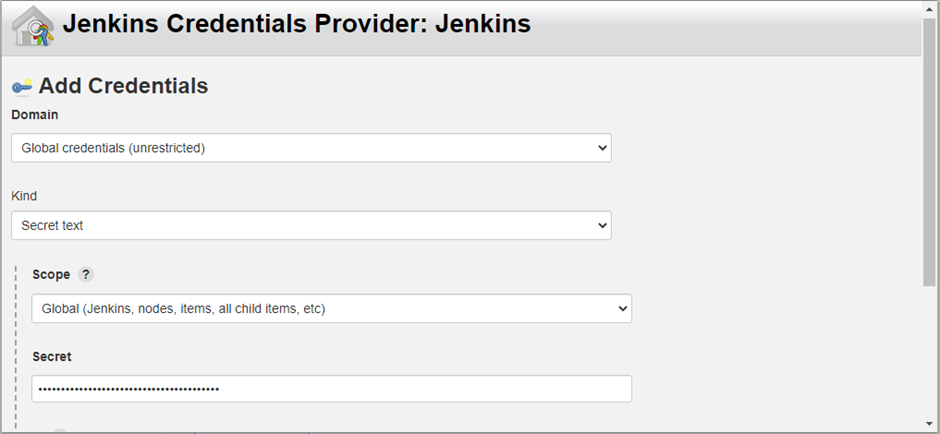
Click Add
Click Apply and Save
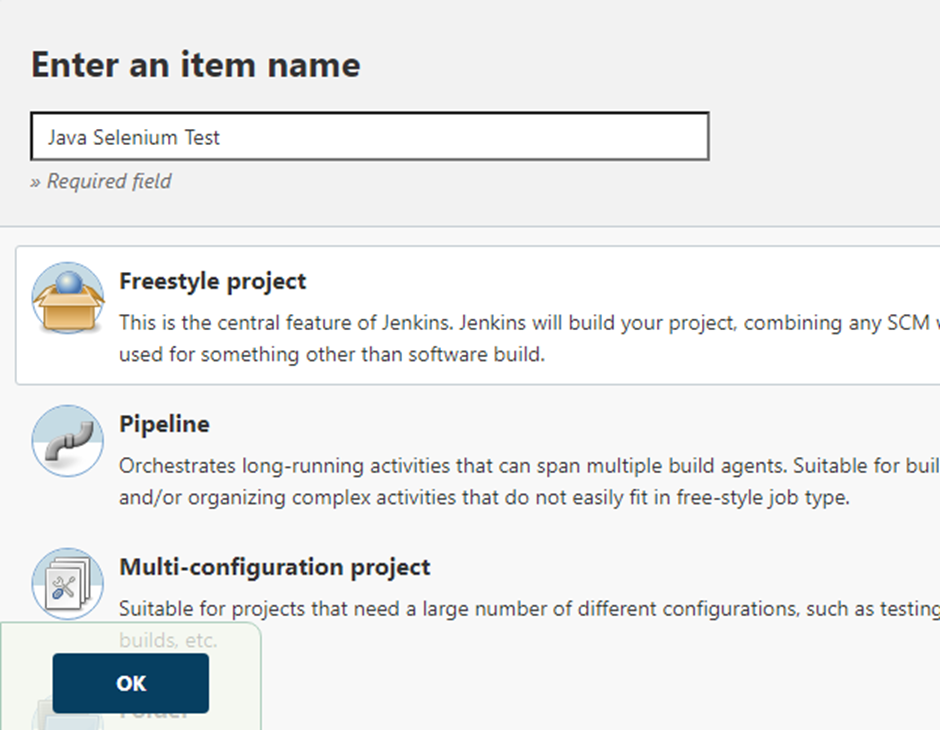
Go to Jenkins Dashboard and click on New Item. Enter details and click on the OK button.
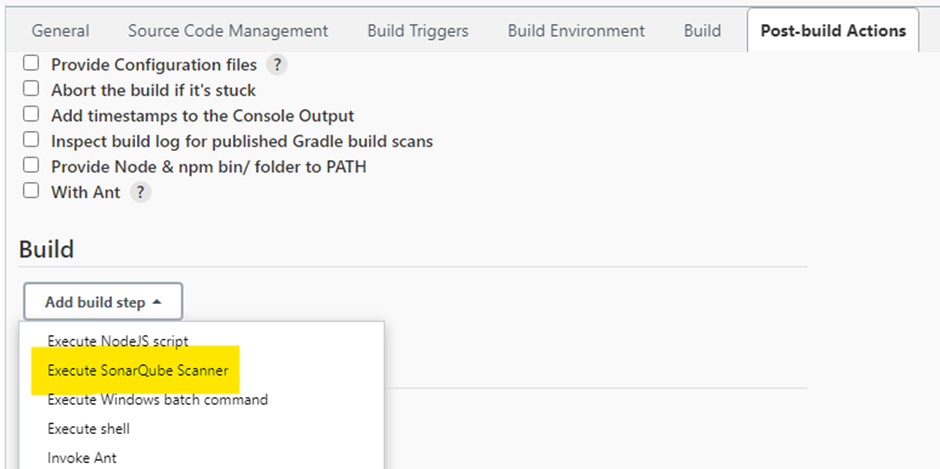
Under Build section- select Execute SonarQube Scanner Option.
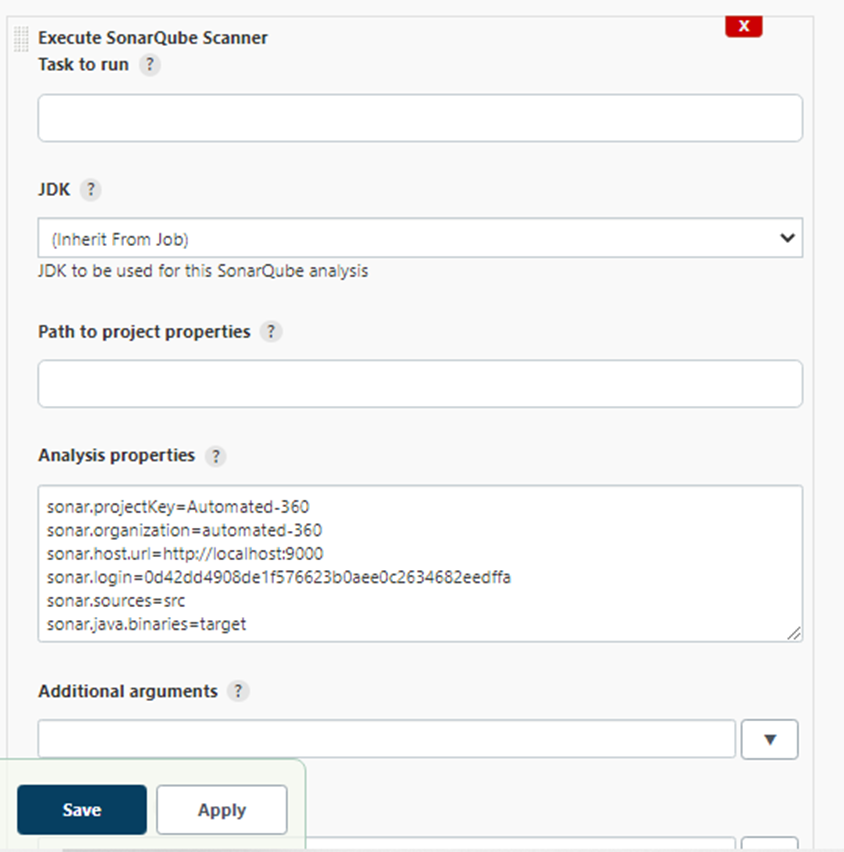
Enter the path of project properties or write down the Analysis Properties.
Under Source Code Management Section. Add details of your repository

You are now all set to run your analysis. Build your Jenkins job. SonarQube analysis report should be visible to you on the dashboard.


