
We’ll learn how to integrate SonarLint with Eclipse and IntelliJ in this post. This will allow you to assess the quality of your test automation before committing it to your code repository. Eclipse and IntelliJ are the most popular IDEs for Selenium Test Automation. Another easy way to integrate with SonarQube is using Jenkins jobs. Read more on how to set up Jenkins and SonarQube for test automation.
In this Post
What is SonarLint?

SonarLint is an IDE extension that helps you detect and fix quality issues as you write code. Like a spell checker, SonarLint squiggles flaws so that they can be fixed before committing code.
Skip to: How to install SonarLint for IntelliJ
How to install SonarLint for Eclipse?
Sonarlint for Eclipse is simple to install and configure. There are a few options for installing this; pick the one that works best for you.
- Install SonarLint via Eclipse Marketplace
- Install as New Software to Eclipse
- Install by Drag Drop from Eclipse Marketplace
Install SonarLint via Eclipse Marketplace
- Open Eclipse Marketplace : Help > Eclipse Marketplace
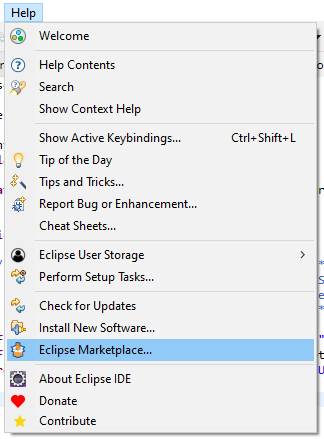
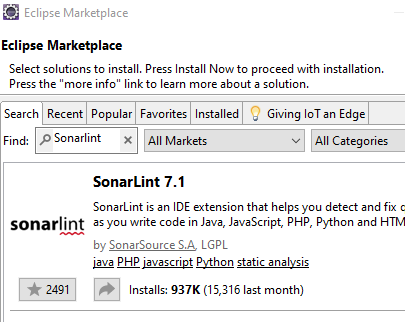
- Click the search tab to search for “SonarLint”
- Click on the Install button against the search result for SonarLint Plugin
- Installation should get started post accepting the license agreement
- Finish by restarting Eclipse. The Eclipse SonarLint marker will then be enabled on issues in the codebase based on the common pre-set rules with SonarLint standalone.
Install SonarLint as New Software to Eclipse
- Go to Menu Option: Help > Install New Software
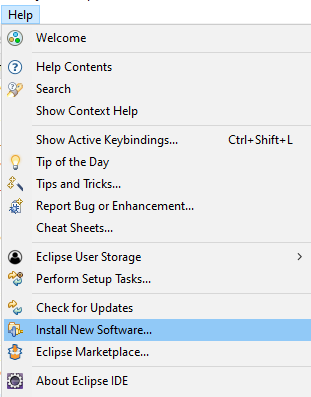
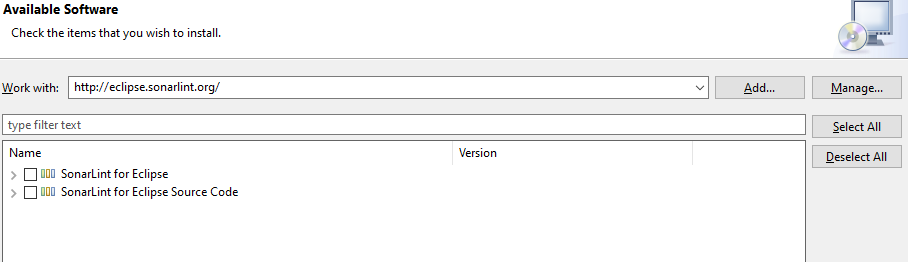
- Enter “‘http://eclipse.sonarlint.org/” in the “Work with” field at Available Software window
- Select SonarLint install options and click Next, click finish in the next window
Install SonarLint by Drag-Drop from Eclipse Marketplace
- Go to SonarLint Eclipse plugin Page – https://www.sonarlint.org/eclipse
- Click on “Install in Eclipse for Free” on the top right, a pop-up with available IDEs will appear
- Click on Eclipse, which will take you to the eclipse market place page
- drag install button there to Eclipse workspace
- check the plugin option and click finish
- You may want to navigate to this page directly – https://marketplace.eclipse.org/content/sonarlint
Bind Eclipse with SonarQube
SonarLint uses the analyzers, quality profiles, and parameters configured on the SonarQube server when the Eclipse project is linked to the SonarQube server project. follow the below steps to bind Sonarlint with SonarQube Server.
- Go to File > New > Other
- Under SonarLint, Select New Server
- Click next and fill the wizard with the Sonar sever details (URL and credentials or token) and test connection.
- Click on Add to select the Project and Done.
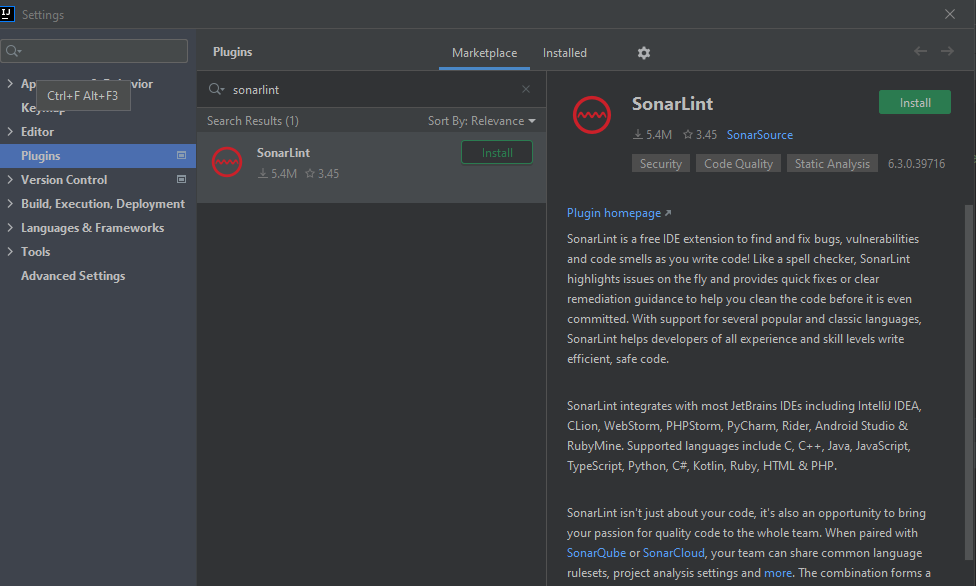
How to Install SonarLint for IntelliJ
- Go to Settings > Plugin
- Search for SonarLint in the search box
- Click on Install button
- Restart IntelliJ and you are done
Right Click on the file to analyze. Then Go to SonarLint > Analyze with SonarLint

Installing Sonarqube
If you already have a sonar server setup, you can directly jump to the integration. Assuming you dont have it, installing sonaqube and setup is simple and quick with docker. refer our detailed post on setting up sonarqube with docker
alternatively, you can follow the below steps
- Download Sonarqube, preferably the community edition – https://www.sonarqube.org/downloads/ – and unzip it.
- Go to the bin folder and launch Sonarqube with StartSonar.bat, which you can find in the windows-x86-64 folder. It should be in the appropriate OS folder.
- Once you’ve started, navigate to http://localhost:9000/ within your browser. Sonarqube should now be operational.
- The default user and password are admin/admin, and the initial login will prompt you to change the password.
Integrate with Sonarqube
Create an authentication token.
- Go to SonarQube → Open your Account/Profile Page → select the Security tab
- Enter or select Name, Type (e.g. User token), and duration of the Expiry
- Generate and Copy the authentication token
To create Sonarqube Connection
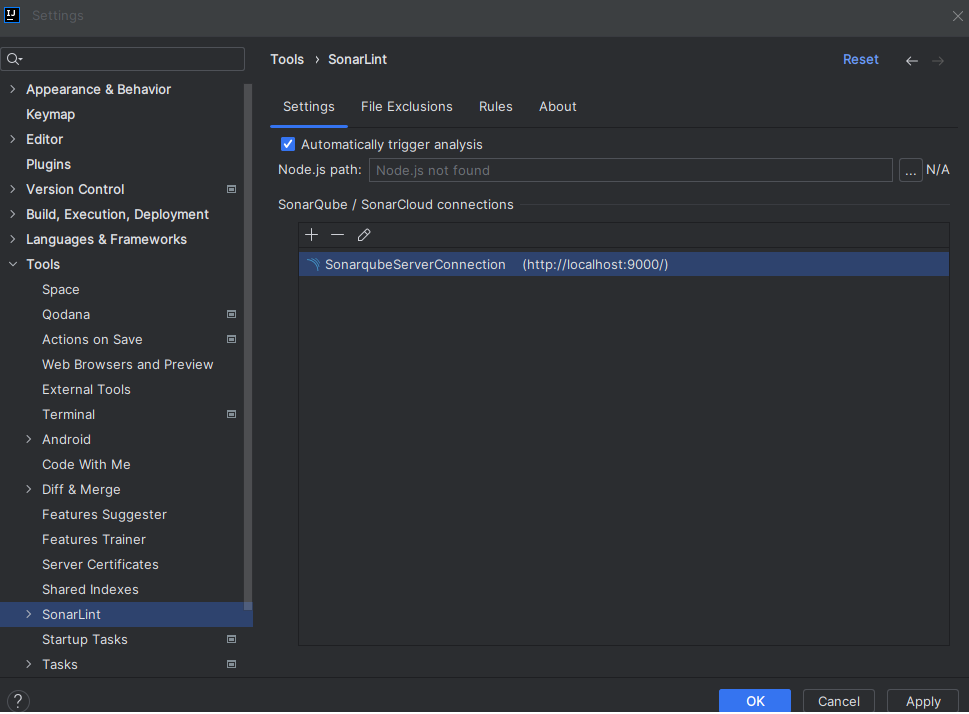
- go to the menu File → Settings → Tools → SonarLint
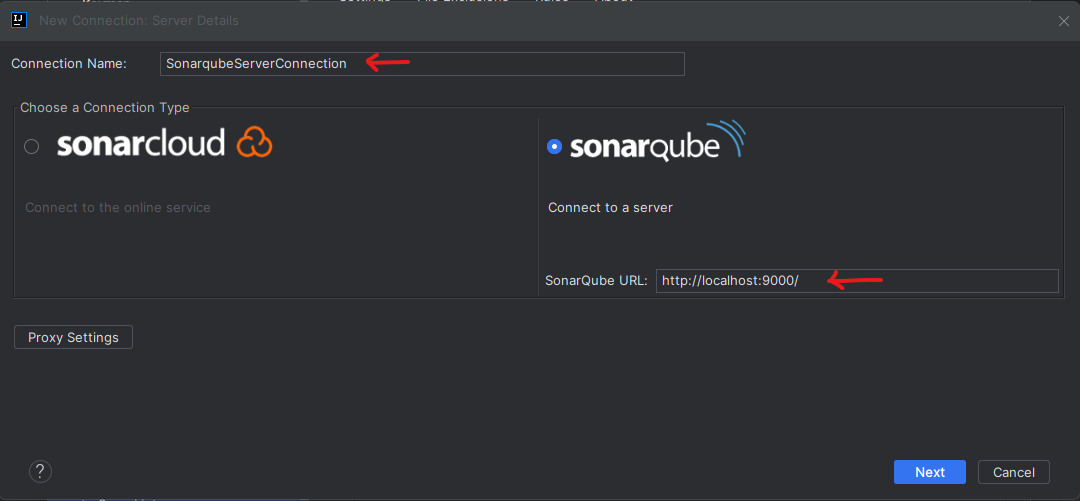
- Select the Settings tab → click on the “+” sign to create a new SonarQube connection
- In the opened window, give a connection name. Choose a Connection type and enter the SonarQube URL
select Authentication type as Token and paste your SonarQube authentication token, you can choose to enter login and password to authenticatee as well.
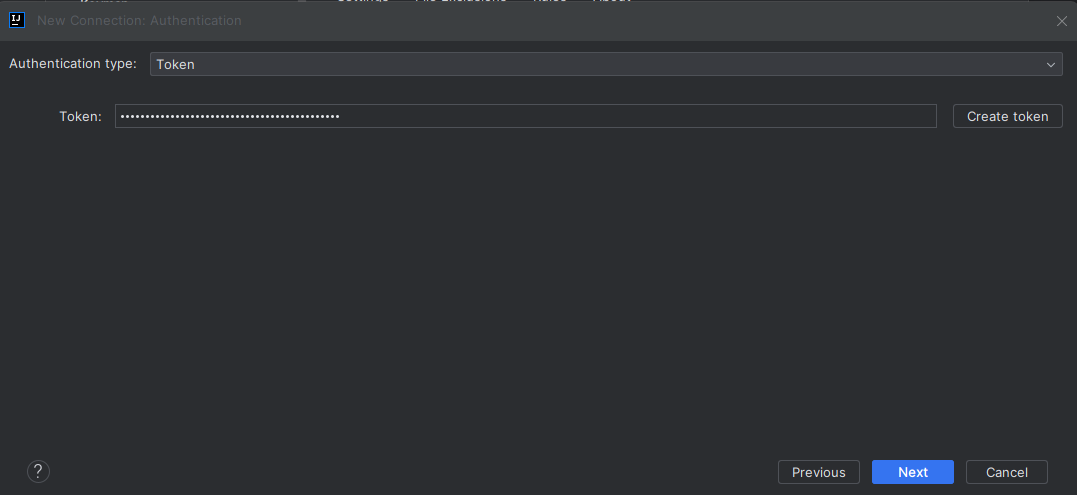
check “Receive notification from SonarQube” if you wish to receive notification about Quality Gate status and click Create at the last screen
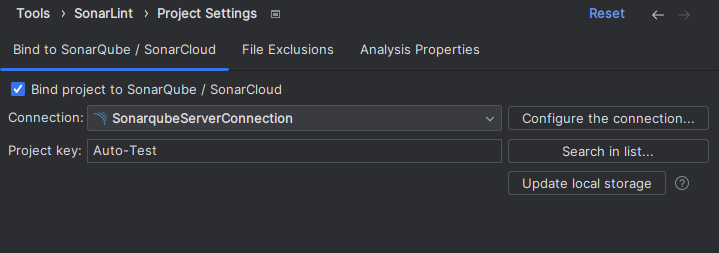
Bind Proejct to the Sonarqube
- In IntelliJ go to the menu File → Settings → Tools → SonarLint → Project Settings
- Select “Bind project to SonarQube.”
- Select the newly created SonarQube Connection in the field Connection
- Search and select your project using “Search in list…” button
- click “Update local storage” to download the settings and rules from the SonarQube server


